TABLE OF CONTENTS
- Introduction
- Creating A Return From Admin Console
- Creating A Return From the Storefront For Registered Buyers
- Creating A Return From the Storefront For Guest Buyers
Introduction
Znode allows users to create multiple Returns (i.e., Return/Cancellation Requests) for a single order. This article provides information about how a Return can be created for users from the Admin Console and Storefront.
- Return creation from the admin console
- Return creation for guest users from the web store
- Cancellations through Returns
Creating A Return From Admin Console
Navigate to: OMS > Orders
Admin users can create Returns for guests and registered users from the Orders list screen using the Create Return icon and the Manage Order screen using the Create Return Button
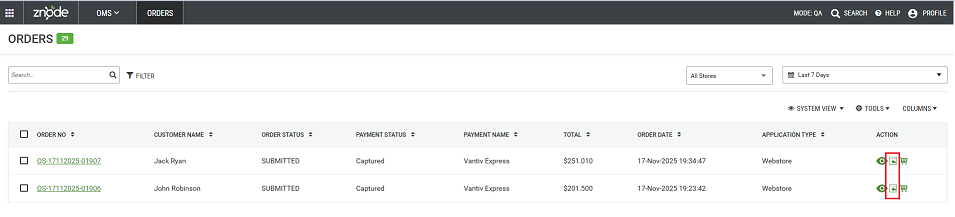
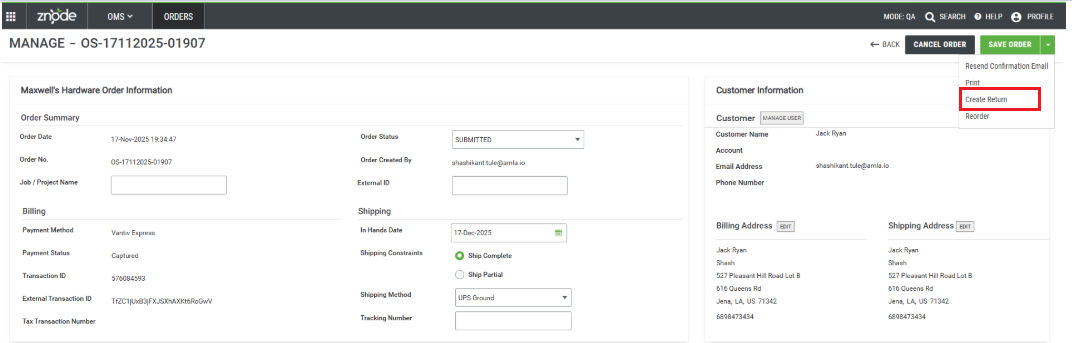
To create a Return, admin users can follow the steps below:
- Step 1: Click on the Create Return icon from the Orders list screen, or the Create Return button from the Manage Order screen. If the Order is not eligible for a return, then a notification message will be displayed; otherwise, the user will be redirected to the Create Return screen
- Step 2: Create a Return screen that displays the eligible line items and the eligible quantities (under Available Qty) that can be returned/canceled. Add the quantities that need to be returned (under Return Qty). The application will automatically calculate the Return Summary based on the entered quantities
- Step 3: Select Reason For Return
- Step 4: Add Return Notes (optional)
- Step 5: Click on the Submit button. This action will
- Create a Return
- Display a Return Receipt
- Send an email notification to the admin user and the buyer for whom the Return was created
Creating A Return From the Storefront For Registered Buyers
- Registered buyers can create Returns for their Orders from the Order Tracking page using the Create Return button or
- From the Orders list page (in their account dashboard), using the Create Return icon or
- From the Returns list page (in their account dashboard), use the Create Return button on the storefront.
Note: Registered buyers must log in to the storefront to create a Return.


To create a Return, users can follow the steps below:
- Step 1: Log in to the account (mandatory)
- Step 2: Navigate to the Track Order page and track an Order associated with the respective logged-in buyer’s account, and click on the Create Return button OR
Navigate to the Orders History page and click on the Create Return icon for the respective Order
OR
Navigate to the Returns History page and click on the Create Return button.
If the Order is not eligible for a return, then the Create Return button will be disabled or a notification message will be displayed (depending on the page the buyer is on); otherwise, the buyer will be redirected to the Create Return page
Step 3: (Skip if not coming from the Returns list page) Select Order Number to see the eligible line items from the Order
Step 4: Create a Return screen that displays the eligible line items and the eligible quantities (under Available Qty) that can be returned/canceled for the selected Order. Add the quantities that need to be returned (under Return Qty). Totals automatically calculate for the Return Summary based on the entered quantities.
Step 5: Add Return Notes (optional)
Step 6: Click on the Submit Return button. This action will
Create a Return
Display a Return Receipt
Send an email notification to the admin user and the buyer for whom the Return was created

Admin users can also create Returns for registered buyers by following the same steps as mentioned above, by impersonating a buyer from the Customers > Users > Manage User screen
Creating A Return From the Storefront For Guest Buyers
Guest Buyers can create Returns for their Orders from the Order Tracking page using the Create Return button.

To create a Return, guest buyers can follow the steps below:
- Step 1: Navigate to the Track Order page and track an Order associated with the guest buyer’s account, and click on the Create Return button. If the Order is not eligible for a return, then the Create Return button will be disabled; otherwise, the buyer will be redirected to the Create Return page.
- Step 2: Create a Return screen that displays the eligible line items and the eligible quantities (under Available Qty) that can be returned/canceled for the respective Order. Add the quantities that need to be returned (under Return Qty). Totals automatically calculate for the Return Summary based on the entered quantities.
- Step 3: Add Return Notes (optional)
- Step 4: Click on the Submit Return button. This action will
- Create a Return
- Display a Return Receipt
- Send an email notification to the admin user and the guest buyer for whom the Return was created
