Manual Workflow Introduction
- This document provides a clear, comprehensive set of best practices for managing media within Znode’s internal Digital Asset Management (DAM) system, also known as the Media Explorer. The internal DAM is designed for structured, controlled environments and performs best when used within recommended operational limits.
The purpose of this guide is to help administrators and content managers maintain an organized, efficient, and scalable media library. It outlines essential principles required to ensure optimal performance and long‑term stability of the DAM.
Specifically, this guide explains:
The recommended limits for storing and managing media in the internal DAM
How to structure and organize folders effectively
Ideal image dimensions, formats, and file sizes
Recommended batch sizes for bulk image uploads
When it’s appropriate to transition to External Media Storage
By following the practices outlined in this guide, teams can maintain a fast, reliable, and well‑organized DAM that supports both current needs and future growth.
Disclaimer
- This information applies exclusively to production environments. Non-production environments may experience degraded performance due to differences in server configuration and resource allocation.
Folder Structure Guidelines
- A clean, shallow folder hierarchy is essential to maintain performance and user efficiency.
- Recommended Folder Hierarchy

- Why Folder Depth Matters
- The DAM computes folder structures dynamically. Deep or complex hierarchies increase processing overhead and make content harder to find.
- Examples of WELL‑STRUCTURED Organization (Images + Documents)

- Examples of POOR Organization
- Deep nesting (hard to navigate):
- Products > Documents > Electronics > Phones > Manuals > 2024 > English > PDFs > Final
- Everything mixed into one folder:
- Deep nesting (hard to navigate):

- Folder Best Practices
- Use clear, descriptive names (e.g., “Banners,” “Manuals (PDF),” “Warranty Info”).
- Group like with like (e.g., keep PDFs in “Documents” subfolders).
- Keep maximum depth to 2 levels
- Use category‑specific folders when beneficial (e.g., “Products > Electronics”).
Media Optimization Guidelines
- Optimizing media file size is one of the most critical factors influencing page load speed, SEO rankings, mobile performance, Core Web Vitals, and overall conversion rates. This information applies exclusively to production environments. Non-production environments may experience degraded performance due to differences in server configuration and resource allocation.
- Unoptimized images, documents, and banners significantly slow down the storefront, increase bounce rates, and lead to a poor customer experience.
- The following recommendations define what is considered GOOD (optimized, fast, SEO‑friendly) and what is BAD (slow, heavy, harmful to performance).
- Image Dimensions (for Media Containing Images)
Use Cases | Ideal Pixels/Sizes | Maximum Pixels/Sizes |
Thumbnails | 400 × 400 px | 800 × 800 px |
Product Detail (Images) | 1200 × 1200 px | 2000 × 2000 px |
Product Image (Primary) - Zoomable Images | 1500 - 2000 px width | 2500 px width/height |
Banners | 1920 × 600 px | 2500 px * 800 px |
Category/Brand Images | 800 × 800 px | 1200 × 1200 px |
- Dimension Best Practices
- Use appropriate dimensions for the intended display
- 1200 × 1200 px is more than enough for most product detail pages.
- Use square images for products and categories for consistency.
- Keep banner height between 500–800 px (wide formats load faster and display better).
- Image File Size Targets
- Use appropriate dimensions for the intended display
Media Type | Ideal File Size Range |
Thumbnails | 50–150 KB |
Product Images | 150–500 KB |
Banners | 200–800 KB |
Overall Rule: Keep media under 1 MB whenever possible. | |
- Document (PDF) Optimization
- Compress PDFs before upload (aim for < 1 MB for manuals; 1–3 MB for brochures if needed)
- Export to screen‑optimized settings (RGB, 72–150 DPI)
- Remove unused images, embedded fonts, and extra metadata
- Avoid uploading print‑quality (300 DPI CMYK) unless explicitly required for download.
- Recommended Formats
- JPG/JPEG — Standard photos and product imagery
- PNG — Only when transparency is needed (icons, overlays)
- WebP — Smaller size with high quality (use when storefront supports it)
- PDF — For downloadable manuals, warranties, spec sheets.
- Optimization Examples (Images + Documents)
- Good
- Product hero image resized to 1200 px at 350 KB (JPG)
- Category thumbnail exported as WebP at 90 KB
- PDF user manual compressed to 900 KB
- Banner exported as JPG (no unnecessary PNG)
- Bad
- Uploading a 6000 px DSLR image at 8 MB
- Uploading a 35 MB brand catalog PDF
- Using PNG where transparency is not needed
- Uploading multi‑page PDFs without compression
- Good
Bulk Upload Best Practices
- Uploading media to the internal Digital Asset Management (DAM) system can be done in two recommended ways, depending on your needs and the volume of assets being uploaded:
- Using Znode DAM (Web Interface) i.e. ADD NEW button in Media Explorer
- Using Microsoft’s Azure Storage Explorer
- Using Znode DAM (Web Interface) i.e. ADD NEW button in Media Explorer
- Bulk uploading many files at once through the DAM web interface can overwhelm both the browser and the internal DAM.
- Recommended Upload Batch Size
- Max 200 media files per batch
- Each upload session has a maximum total file size limit of 20 MB. This means that the combined size of all files uploaded within a single session must not exceed 20 MB. If the total size goes beyond this limit, the upload will not be successful, and you may need to reduce file sizes or split them across multiple sessions.
- For Example:
- Admins can upload 1 file of 20 MB, which uses the entire allowed limit in a single file.
- Admins can upload multiple smaller files, such as 4 files of 5 MB each (total = 20 MB).
- Admins can even upload 200 very small files, as long as their total combined size does not exceed 20 MB (for instance, 200 files of 0.1 MB each).
- For Example:
- Each upload session has a maximum total file size limit of 20 MB. This means that the combined size of all files uploaded within a single session must not exceed 20 MB. If the total size goes beyond this limit, the upload will not be successful, and you may need to reduce file sizes or split them across multiple sessions.
- Max 200 media files per batch
- What Happens with 500 or 1,000+ Files at Once
- Browser freezes or timeouts
- Partial or failed uploads
- Image Generation issues
- Bulk Upload Best Practices
- Upload in batches of Max 200 (with total media size upto 20 MB max)
- Use consistent naming conventions (e.g., SKU‑based)
- Avoid simultaneous large uploads by multiple admins
- Validate and compress before uploading
- Important
- As soon as images are uploaded to the Znode DAM, the system automatically processes them and generates multiple image renditions in different predefined sizes.
- These resized versions are created to meet the display requirements of various product listings, categories, thumbnails, search results, and promotional components across the Znode platform.
- The original high-resolution image remains stored in the DAM, while the system-generated versions are dynamically used wherever required across the platform.
- This automated resizing process helps maintain visual consistency, performance efficiency, and scalability throughout the Znode ecosystem.
- Bulk Upload Examples (Images + Documents)
- GOOD
- Batch of: 120 product images + 50 icons + 30 PDF manuals = 200 files with total media size less than 20MB.
- BAD
- Attempting 1,500 images + 600 PDFs (2,100 files) in one upload
- Two admins uploading 500 files each at the same time
- GOOD
Using Microsoft Azure Storage Explorer
- This guideline provides a detailed, standardized process for uploading media assets (images, videos, audio, documents, design files, etc.) to Azure Blob Storage using Microsoft Azure Storage Explorer.
- This method is recommended for bulk uploads, high-resolution media, structured folder ingestion, and enterprise-level transfers prior to DAM indexing and processing.
- In this section, following is covered:
- When to Use Azure Storage Explorer
- How to Download & Install Azure Storage Explorer
- Ways to Connect to Azure Storage
- How to Navigate to the Correct Storage Location
- How to Upload Media
- Verification of Upload Completion (Manual Checklist)
- Limitations
- Next Steps After Uploading Media in Microsoft Azure Media Explorer
- Sync Media
- Generate Images
- When to Use Azure Storage Explorer
- Use Azure Storage Explorer instead of the web-based DAM upload when:
- Uploading more than 200 media files at once or with media file size more than 20 MB.
- Uploading large video files (e.g., 4K/8K footage)
- Uploading thousands of assets at once
- Preserving folder structure during upload
- Replacing an entire media set
- Azure Storage Explorer connects directly to Azure Blob Storage, ensuring faster and more stable transfers compared to browser-based uploads.
- Use Azure Storage Explorer instead of the web-based DAM upload when:
- Download & Install Azure Storage Explorer
- Azure Storage Explorer is a free desktop application provided by Microsoft for managing Azure Storage resources.
- Official Resources
- Product download page: https://azure.microsoft.com/en-us/products/storage/storage-explorer/
- Installation & prerequisites: https://learn.microsoft.com/en-us/azure/storage/storage-explorer/vs-azure-tools-storage-manage-with-storage-explorer
- Installation Steps
- Visit the official Microsoft product page.
- Download the correct installer for:
- Windows
- MacOS
- Linus
- Review prerequisites:
- Storage Explorer includes required runtime dependencies (e.g., .NET 8) if not already installed.
- Complete Installation
- Launch the Application
- Connect to Azure Storage
- Azure Storage Explorer supports multiple secure authentication methods. The correct method will be provided by your Znode/Amla Commerce Team.
- Recommended: Connect via SAS URL or Connection String
- Click Connect
- Select
- Shared Access Signature (SAS)
- Connection String
- Connection String
- Confirm the connection.
- Alternative: Sign In with Azure Account
- Official sign-in guide: https://learn.microsoft.com/en-us/azure/storage/common/storage-explorer-sign-in
- After authentication, all accessible storage accounts will appear in the left navigation panel.
- Navigate to the Correct Storage Location
- Media files are stored as blobs inside Blob Containers within an Azure Storage Account.
- Official reference: https://learn.microsoft.com/en-us/azure/storage/storage-explorer/vs-azure-tools-storage-explorer-blobs
- Folder Navigation Structure
- In the left panel:
- In the left panel: Subscriptions → Storage accounts → <Your account> → Blob Containers.
- Double‑click a container to open it (or right‑click to Create Blob Container). [learn.microsoft.com]
- In the left panel:
- Important Validation Before Uploading
- Before Proceeding:
- Confirm the correct storage account
- Confirm the correct container
- Confirm the correct folder path
- Ensure naming aligns with project structure
- Uploading to the wrong Container may:
- Delay DAM ingestion
- Cause duplication
- Trigger incorrect metadata workflows
- Before Proceeding:
- Upload Media Files or Folders
- Azure Storage Explorer supports:
- Individual file upload
- Multi-file selection
- Entire folder upload
- Drag-and-drop upload
- Recommended Workflow for Bulk Projects
- Organize files locally first.
- Maintain the final folder structure before uploading.
- Open the target container.
- Click Upload → Select:
- Upload Files
- Upload Folder (recommended for structured delivery)
- Review settings:
- Blob type: Keep default (Block Blob)
- Overwrite: Enable only when intentionally replacing files
- Click Upload
- Monitoring Upload
- View progress in the Activities panel (bottom of application).
- Large files may take significant time depending on network speed.
- Do not close the application until the upload is fully complete.
- Azure Storage Explorer supports:
- Verify Upload Completion
- After upload, follow the validation checklist:
- All files visible in container
- File sizes match local files
- No failed transfers in Activities panel
- Correct folder hierarchy preserved
- Correct naming conventions applied
- After upload, follow the validation checklist:
- Official Resources
- Azure Storage Explorer is a free desktop application provided by Microsoft for managing Azure Storage resources.
Azure Storage Explorer allows a preview of supported file types, which helps verify successful uploads.
- Limitations
- While Microsoft Azure Storage Explorer is a powerful tool for managing Azure storage resources, it has certain limitations—especially when used for large-scale media workflows or DAM operations.
- Not a Media Management Tool
- Azure Storage Explorer is a storage management client, not a Digital Asset Management (DAM) system.
- No metadata schema enforcement
- No tagging, taxonomy, or categorization workflows
- No approval workflows
- No media version comparison tools
- No automated image renditions or transcoding
- Azure Storage Explorer is a storage management client, not a Digital Asset Management (DAM) system.
- No Built-In Media Processing such as
- No automatic image resizing
- No video transcoding
- No thumbnail generation
- No format conversion
- Performance Constraints for Extremely Large Transfers
- Although stable for large uploads, limitations include:
- No advanced transfer acceleration by default
- Large batch uploads may stall if connection drops
- No automatic resume across sessions in some failure cases
- Although stable for large uploads, limitations include:
- Manual Workflow
- Uploads require manual user interaction:
- No scheduled uploads
- No automated folder syncing
- No built-in CI/CD style deployment
- No bulk metadata editing
- It is primarily a GUI-based tool.
- Uploads require manual user interaction:
- Security Responsibility Lies with the User
- While secure when configured correctly, risks include:
- Accidental exposure via improperly configured SAS tokens
- Manual sharing of access keys
- Uploading to incorrect containers
- No built-in governance guardrails for DAM workflows
- Security Guidelines: https://learn.microsoft.com/en-us/azure/storage/common/storage-explorer-security?utm_source=chatgpt.com
- If the target storage account has a firewall or network rules enabled, Storage Explorer connections may be restricted.
- Microsoft documentation highlights network access limitations for Azure Storage operations: https://learn.microsoft.com/en-us/azure/storage/common/storage-network-security-limitations?utm_source=chatgpt.com
- While secure when configured correctly, risks include:
- Limited Search and Discovery
- Azure Storage Explorer supports basic filtering but lacks:
- Full-text search within media
- AI-based tagging
- Content-based search
- Advanced asset discovery
- Files are primarily organized through folder structures.
- Azure Storage Explorer supports basic filtering but lacks:
- Not a Media Management Tool
- While Microsoft Azure Storage Explorer is a powerful tool for managing Azure storage resources, it has certain limitations—especially when used for large-scale media workflows or DAM operations.
Next Steps After Uploading Media in Microsoft Azure Media Explorer
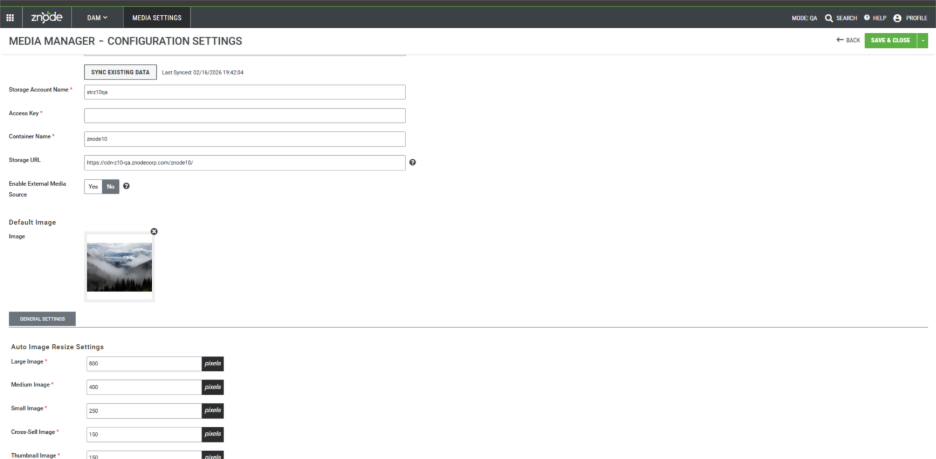
- Once media assets have been successfully uploaded, follow the steps below to ensure they are properly synchronized and optimized within the DAM system.
- Sync Media in DAM
- Generate Images in Multiple Sizes
- Sync Media in DAM
- After confirming that the upload process is complete in Microsoft Azure Media Explorer:
- Navigate to DAM → Media Settings.
- Click the “Sync Media” button.
- What This Does
- Initiates synchronization between Azure storage and DAM.
- Registers newly uploaded assets in the DAM database.
- Updates metadata and asset availability.
- Ensures files are accessible for downstream processes (e.g., image generation, publishing).
- Best Practices
- Verify that all files are fully uploaded before starting the sync.
- Perform sync during off-peak hours if processing large batches.
- After confirming that the upload process is complete in Microsoft Azure Media Explorer:
- Monitor the Sync Progress
- A progress bar will display the real-time sync status.
- Wait until the process shows 100% completion before proceeding.
- Generate Images in Multiple Sizes
- Once syncing is complete:
- On the same Media Settings screen, select “Generate Images.”
- Initiate generation of images in required preset sizes.
- Purpose
- Creates optimized renditions for various platforms (web, mobile, thumbnails, etc.).
- Improves performance and ensures consistent display standards across channels.
- Estimated Processing Time
- Approximately 2 hours for 500 images.
- Processing time may vary depending on:
- File size and resolution
- System load
- Number of image variants configured
- Best Practices:
- Initiate image generation only after sync is fully complete.
- Schedule large batches during non-business hours.
- Avoid editing or deleting assets while image generation is in progress.
- Validate a sample of generated images for correct sizing and quality.
- Generate Images – Progress Indicator Update
- After clicking “Generate Images” in DAM → Media Settings, the system begins creating image renditions in the configured sizes.
- Current Status (Planning Phase)
- Unlike the Sync Media process, the Generate Images function currently does not display a progress bar.
- The progress tracking feature for image generation is in the planning phase.
- A visible progress indicator will be introduced in an upcoming release.
- Until then, processing occurs in the background without real-time percentage tracking.
- Unlike the Sync Media process, the Generate Images function currently does not display a progress bar.
- Once syncing is complete:
When to Use External Media Storage
- The internal DAM is well‑suited for businesses with small to mid‑size media catalogs, predictable growth, and simple folder structures. However, as media volume, complexity, and heavy usage, the internal DAM may no longer provide optimal performance.
- Switch to External Media Storage when:
- Folder organization requires deeper or more complex hierarchy
- Large creative or marketing assets are frequently used (e.g., high‑resolution brochures, PSD files, AI design files).
- Benefits of External Media Storage
- External Media Storage provides a wide range of advantages, particularly for enterprises with growing or complex media needs:
- Greater scalability with flexible storage capacity
- Reduced load on application infrastructure
- Improved performance for large catalogs and high-volume content workflows
- Long‑term stability, governance, and better content management.
- External Media Storage provides a wide range of advantages, particularly for enterprises with growing or complex media needs:
- Examples:
- Internal DAM Still Works Well When:
- The business manages 5,000 product images and 500 PDFs (manuals, datasheets, guides)
- The folder structure is clean, shallow, and well-organized
- Media updates occur on a predictable, manageable schedule.
- External Storage Becomes Necessary When:
- The library contains 48,000 product photos, 6,000 marketing PDFs, and 3,000 campaign banners
- Teams frequently upload PSDs, AI files, or high-resolution print PDFs that place heavy load on the internal DAM.
- Internal DAM Still Works Well When:
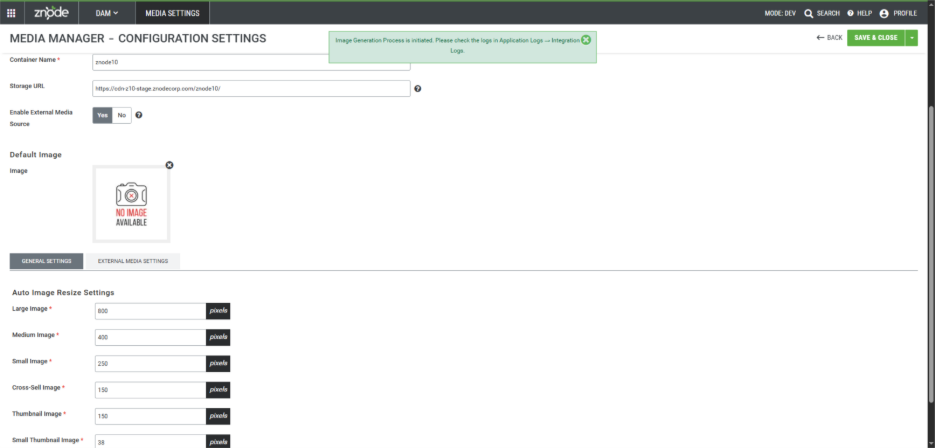
- External Media Source Enablement in Znode DAM
- Feature Activation
- Enable External Media Source
- Setting Name: Enable External Media Source:
- Enabling this option allows the administrator to configure and use media from an external source.
- Configuration Behavior:
- When set to NO:
- System operates using standard internal DAM behavior.
- External Media Configuration tab remains hidden.
- When set to YES:
- External Media Configuration tab becomes visible.
- External Base URL becomes mandatory.
- All DAM-enabled UI components update to support multiple media sources.
- When set to NO:
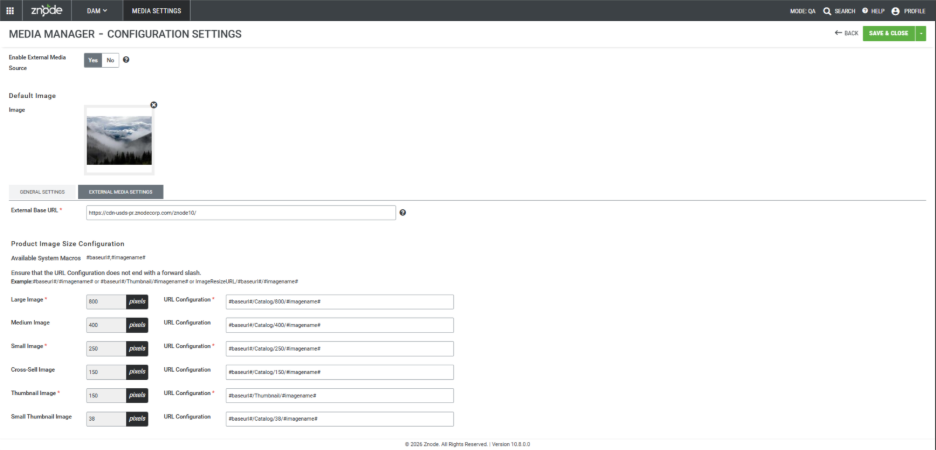
- Configuration Details (When Enable External Media Source = Yes):
- In the newly introduced “External Media Settings” section, the following configuration must be completed carefully and accurately:
- External Base URL
- This field is intended for entering the base URL of the external media storage location. It is a free-text input field where the full external storage address should be provided.
- Please note the following important considerations:
- No automatic format validation is applied. The system does not check whether the entered value follows a valid URL structure.
- Protocols are not verified. There is no validation to confirm whether the URL begins with http://, https://, or any other protocol.
- Accuracy is the administrator’s responsibility. Since the system does not perform validation checks, the administrator must ensure that the URL is correctly formatted, accessible, and points to the intended external storage location.
- Please note the following important considerations:
- This field is intended for entering the base URL of the external media storage location. It is a free-text input field where the full external storage address should be provided.
Configurations - External Media URL Settings
This section explains how to correctly configure image URL patterns using the available system macros.
Available System Macros
The following system macros can be used when defining URL configurations:
#baseurl# – Automatically replaced with the configured External Base URL.
#imagename# – Automatically replaced with the actual image file name.
These macros must be used exactly as shown and are case-sensitive.
Important Configuration Rules
Before setting up the image URLs, ensure the following:
Do not end the External Base URL with a forward slash (/).
Example:
❌ https://media.company.com/
The system does not validate URL format, structure, or protocol (HTTP/HTTPS). The administrator must ensure that:
The URL is correct and accessible.
The path structure exists on external storage.
Images are stored in the expected folder hierarchy.
- Always use the provided macros to dynamically construct image paths.
- Below are valid example formats for constructing URLs:
- #baseurl#/#imagename#
- #baseurl#/Thumbnail/#imagename#
- ImageResizeURL/#baseurl#/#imagename#
- Verification Checklist
- Please verify that the image dimensions meet the recommended pixel sizes for each image type, such as cross-sell images, thumbnails, and others.
- The External Base URL is correct and does not end with /.
- All folder paths (e.g., /Catalog/800/, /Thumbnail/) exist in the external storage.
- Images are available in the expected resolutions.
- A sample image URL loads successfully in a browser.
- External Base URL
- In the newly introduced “External Media Settings” section, the following configuration must be completed carefully and accurately:
- Setting Name: Enable External Media Source:
- Media Association Workflow (via Admin Console)
- When External Media Source is enabled, media can be associated using three distinct methods.
- Browse From DAM
- Navigate to the media library to select the desired file.
- Click BROWSE FROM DAM to open the Znode DAM (Digital Asset Management) system.
- External Media
- Add External Files
- Media Files can also be attached using the configuration set in External Media Settings by specifying the File Location.
- File Name Only: e.g., samplefile.jpg
- If the file is located in one of the configured folders for product images.
- Path with File Name: e.g., /foldername/samplefile.jpg
- If the file (e.g., documents, videos, or banner images) is stored in external media, add the file path after the external URL to configure the respective media.
- Full URL to an External File: e.g., https://www.sample.com/samplefile.jpg
- File Name Only: e.g., samplefile.jpg
- If File Exists:
- Media files are associated with Znode Entity.
- If File Does Not Exist
- Broken image is displayed.
- Media Files can also be attached using the configuration set in External Media Settings by specifying the File Location.
- Add External Files
- Full URL (must begin with http:// or https://)
- The administrator enters a fully qualified URL.
- System validates file accessibility.
- If File Exists:
- Media files are associated with Znode Entity.
- If File Does Not Exist
- Broken Image (is displayed)
- The administrator enters a fully qualified URL.
- Save & Publish Requirement
- Save & Close and Publish required to reflect updates on storefront.
- Browse From DAM
- CSV Import Configurations
- Introduction of Additional Column: Attribute_Source
- Each image/file attribute must include an associated source column.
- Example
- ProductImage_Source
- GalleryImages_Source
- Example
- Accepted Values
- InternalMedia
- Internal DAM (Default if blank)
- ExternalMedia
- External Base URL
- FullURL
- Full external URL
- InternalMedia
- Each image/file attribute must include an associated source column.
- Import Validation Rules
- Blank source column → Treated as InternalMedia
- Any invalid value:
- Import fails
- Error logged in import log
- System does not validate external URL formats.
- Impacted Imports:
- Product Import
- Category Import
- Brand Import
- Highlights Import (HighlightImagePath)
- Attribute Default Value Import (SwatchImagePath)
- Data Integrity & Backward Compatibility
- Existing associations remain unchanged.
- Enabling the feature does not modify historical records.
- Disabling the feature does not delete external media records.
- Only UI behavior and rendering logic change dynamically.
- Known Limitations/Out of Scope
- The following are not supported:
- WYSIWYG editor image uploads
- Automatic media migration.
- URL format validation
- Image size validation
- External provider authentication handling
- The following are not supported:
- Governance & Deployment Considerations
- Perform configuration in staging before production rollout.
- Validate external provider reliability and SLA.
- Confirm support for dynamic resizing if used.
- Document macro patterns internally.
- Test all impacted modules prior to go-live.
- Introduction of Additional Column: Attribute_Source
- When External Media Source is enabled, media can be associated using three distinct methods.
- Future Enhancements
- Plugin-based implementation
- Attribute-level URL pattern configuration
- Advanced macro engine
- URL validation framework
- Enable External Media Source
- Feature Activation
Summary of Best Practices and Guidelines
Category | Recommendation |
Root Folders | Up to 10 |
Subfolders per Root | Up to 10 |
Maximum Folder Depth | 2 levels |
Bulk Upload Batch Size | Max 200 Files (with allowed limit of 20 MB per upload session) |
Ideal Image Dimension | 1200 px (product images) |
Ideal Image File Size | 150–500 KB |
PDF File Size Targets | < 1 MB (manuals), 1–3 MB (brochures) |
Final Recommendations
- The internal DAM performs optimally when businesses:
- Maintain media volumes within the recommended thresholds.
- Keep folder structures simple and shallow.
- Optimize both images and documents before uploading.
- Perform bulk uploads in controlled batches.
- If the project intends to continue using Znode while hosting a higher-than-recommended number of media files and larger-than-recommended file sizes, it is advisable to upgrade the server configuration to ensure optimal performance and stability.
- It is important to connect with the Znode Team to gain a clearer understanding of the maximum number of media files that can be uploaded and managed within the Znode DAM (Digital Asset Management) system. This discussion will help clarify any system-imposed limits, recommended thresholds, or performance considerations related to storing and managing media assets such as images, videos, and documents.