
TABLE OF CONTENTS
- Overview
- Use Cases
- Inventory List
- Edit Inventory
- Delete Inventory
- Inventory Display Behavior
- Important Notes
Overview
Inventory management enables Administrators to maintain stock levels after inventory records have been created. Inventory levels are automatically adjusted as orders are processed, and inventory availability is reflected throughout the Storefront.
Administrators can update inventory quantities, modify reorder thresholds, manage warehouse assignments, remove inventory records, and monitor inventory-related storefront behavior.
Use Cases
Inventory management supports:
- Maintaining current stock quantities
- Monitoring low inventory levels
- Updating warehouse inventory information
- Managing backorder information
- Removing obsolete inventory records
- Verifying inventory availability on the Storefront
Inventory List
Navigate to:
Admin Console > OMS > Inventory
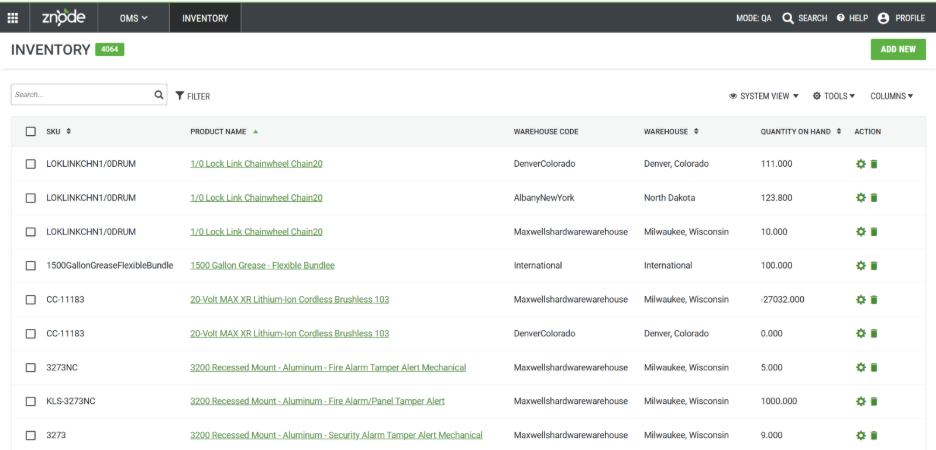
The Inventory page displays all inventory records by SKU and warehouse.
Inventory Grid
The grid displays the following fields:
- SKU
- Product Name
- Warehouse Code
- Warehouse
- Quantity On Hand
- Action
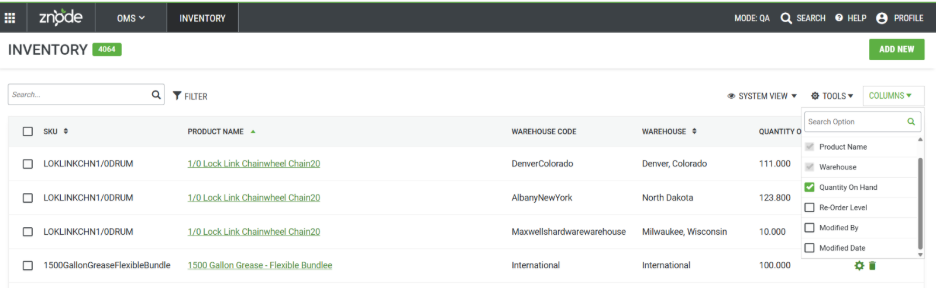
Administrators can add additional columns to the grid by clicking Columns and selecting the desired fields.
Additional Information
- Inventory quantities are automatically adjusted as orders are processed.
- When inventory reaches the configured Reorder Level, low inventory notifications can be generated.
Edit Inventory
Navigate to:
Admin Console > OMS > Inventory
Update an Existing Inventory Record
- Locate the inventory record.
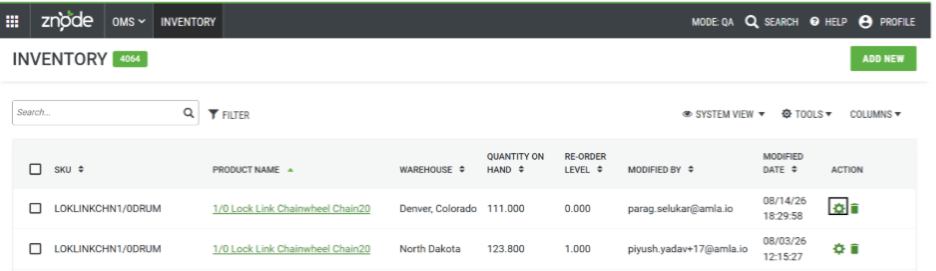
- Select Edit.
- Update the required inventory information.
- Select Save.
Result
The inventory record is updated.
Editable Fields
Administrators can update the following fields:
- Quantity On Hand
- Reorder Level
- Warehouse
- Backorder Quantity
- Backorder Expected Date
Limitations
- The SKU cannot be changed after the inventory record is created.
- If a different SKU is required, a new inventory record must be created.
Delete Inventory
Navigate to:
Admin Console > OMS > Inventory
Remove an Inventory Record
- Locate the inventory record.
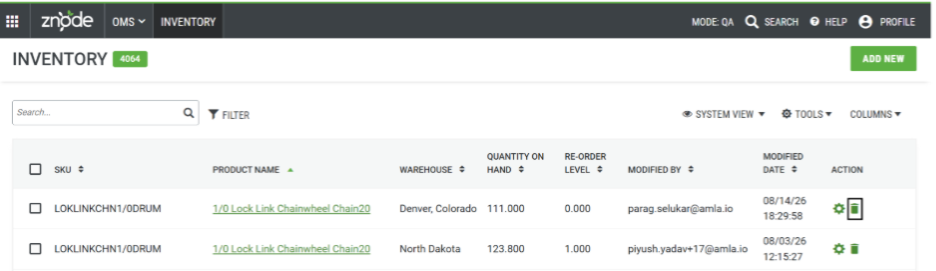
- Select Delete.
- Confirm the deletion.
Result
The selected inventory record is removed from the inventory list.
Inventory Display Behavior
Inventory changes affect product availability throughout the Storefront.
Product Display Page (PDP)
Inventory is updated in real time when:
- Inventory quantities are manually updated.
- Products are purchased.
- Product availability changes.
This behavior is particularly important when inventory settings include:
- Disable Purchase for Out-of-Stock Products
- Allow Back-Ordering of Products
Result
The Product Display Page immediately reflects the current inventory status.
Examples include:
- In Stock
- Out of Stock
- Back Ordered
Inventory Messages
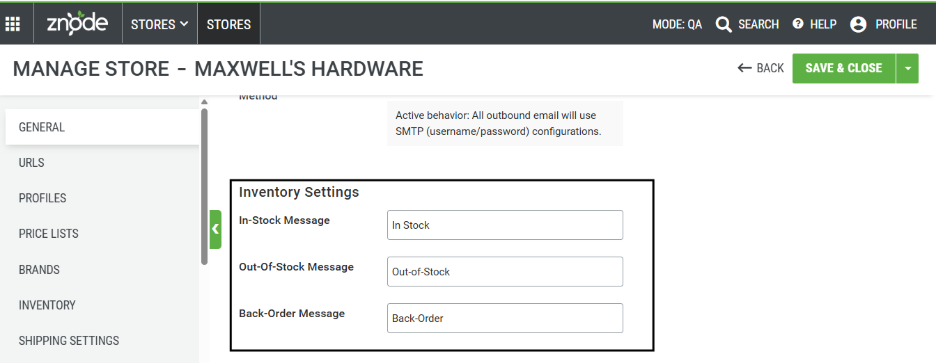
Inventory status messaging is configured through inventory settings.
Common messages include:
- In-Stock Message
- Out-of-Stock Message
- Backorder Message
These messages are displayed on the Product Display Page based on inventory availability.
Product Listing Page (PLP) Behavior
The Product Listing Page may not immediately reflect inventory changes because of caching used to improve storefront performance.
While Product Display Pages show real-time inventory updates, Product Listing Pages may temporarily display cached inventory information.
Validation Tip
To verify updated inventory immediately:
- Open the Storefront in a different browser.
- Open the Storefront in an incognito or private browsing session.
The latest inventory status is typically displayed in these sessions.
Important Notes
- Inventory levels are automatically updated as orders are processed.
- Administrators can update Quantity On Hand, Reorder Level, and Warehouse assignments.
- Inventory records can be deleted when no longer needed.
- Inventory changes made through OMS or Product Management remain synchronized throughout the platform.
- The SKU associated with an inventory record cannot be modified after creation.
- Backorder fields are available for custom implementations and are not natively tied to inventory backorder processing.
- These fields can be leveraged by implementation partners for custom backorder functionality.
Expected Outcome
Administrators can effectively maintain inventory levels, monitor product availability, manage stock across warehouses, and ensure accurate inventory visibility throughout the Storefront and Order Management processes.