
TABLE OF CONTENTS
- Overview
- Prerequisites
- Common Use Cases
- Access Data Exchanges
- Create a Data Exchange
- Configure Data Mapping
- Run a Data Exchange
- Schedule a Data Exchange
- Monitor Data Exchange Activity
- Validate Successful Processing
- Best Practices
- Troubleshooting
- Additional Information
Overview
Data Exchanges in Znode Commerce Connector provide administrators with a centralized way to configure, automate, monitor, and manage data synchronization between Znode and external business systems such as ERP, CRM, PIM, DAM, and other third-party applications. Data Exchanges act as the building blocks that control how information moves between connected systems, helping ensure consistent and accurate business data across your ecommerce ecosystem.
Administrators can use Data Exchanges to manage the transfer of products, pricing, inventory, customer information, and order data through scheduled or real-time integrations.
Prerequisites
Before managing Data Exchanges, ensure that:
- You have Administrator access to the Znode Admin Console.
- Commerce Connector has been configured in your environment.
- The required source and destination systems are available and accessible.
- Any necessary connection credentials for integrated systems have been configured.
Before triggering a Callback using Commerce Connector, ensure the following conditions are met:
Enable CC API Flag
The Enable CC API flag under Global Settings must be set to Yes. This enables Commerce Connector to receive the Znode Callback.Disable Legacy ERP Connectors
Any existing legacy ERP connectors must be in the Disabled state.Enable the Callback Data Exchange
The Data Exchange configured in Commerce Connector to handle the Znode Callback must be in the Enabled state.
Common Use Cases
Administrators commonly use Data Exchanges to:
- Synchronize product catalogs from a PIM or ERP system.
- Update inventory quantities from an ERP.
- Import customer records into Znode.
- Export orders from Znode to an ERP system.
- Exchange pricing and account-specific contract pricing data.
- Schedule automated data synchronization between systems.
Access Data Exchanges
- Sign in to the Znode Admin Console.
- Navigate to the Commerce Connector area.
- List of Data exchange is displayed
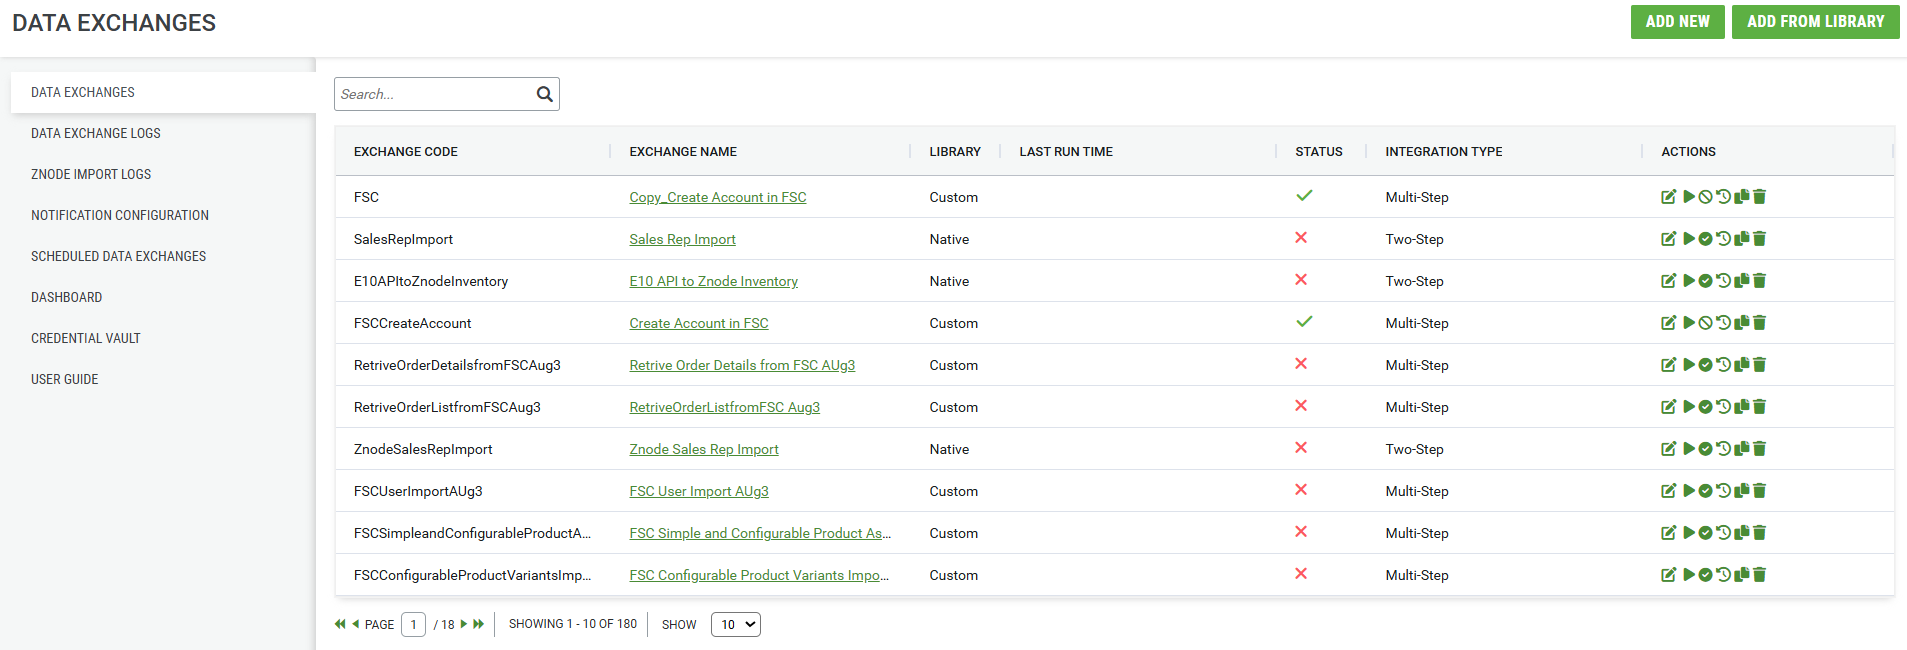
5. Manage Data Exchange screen opens - The Data Exchanges screen displays available integrations and exchange configurations.
Create a Data Exchange
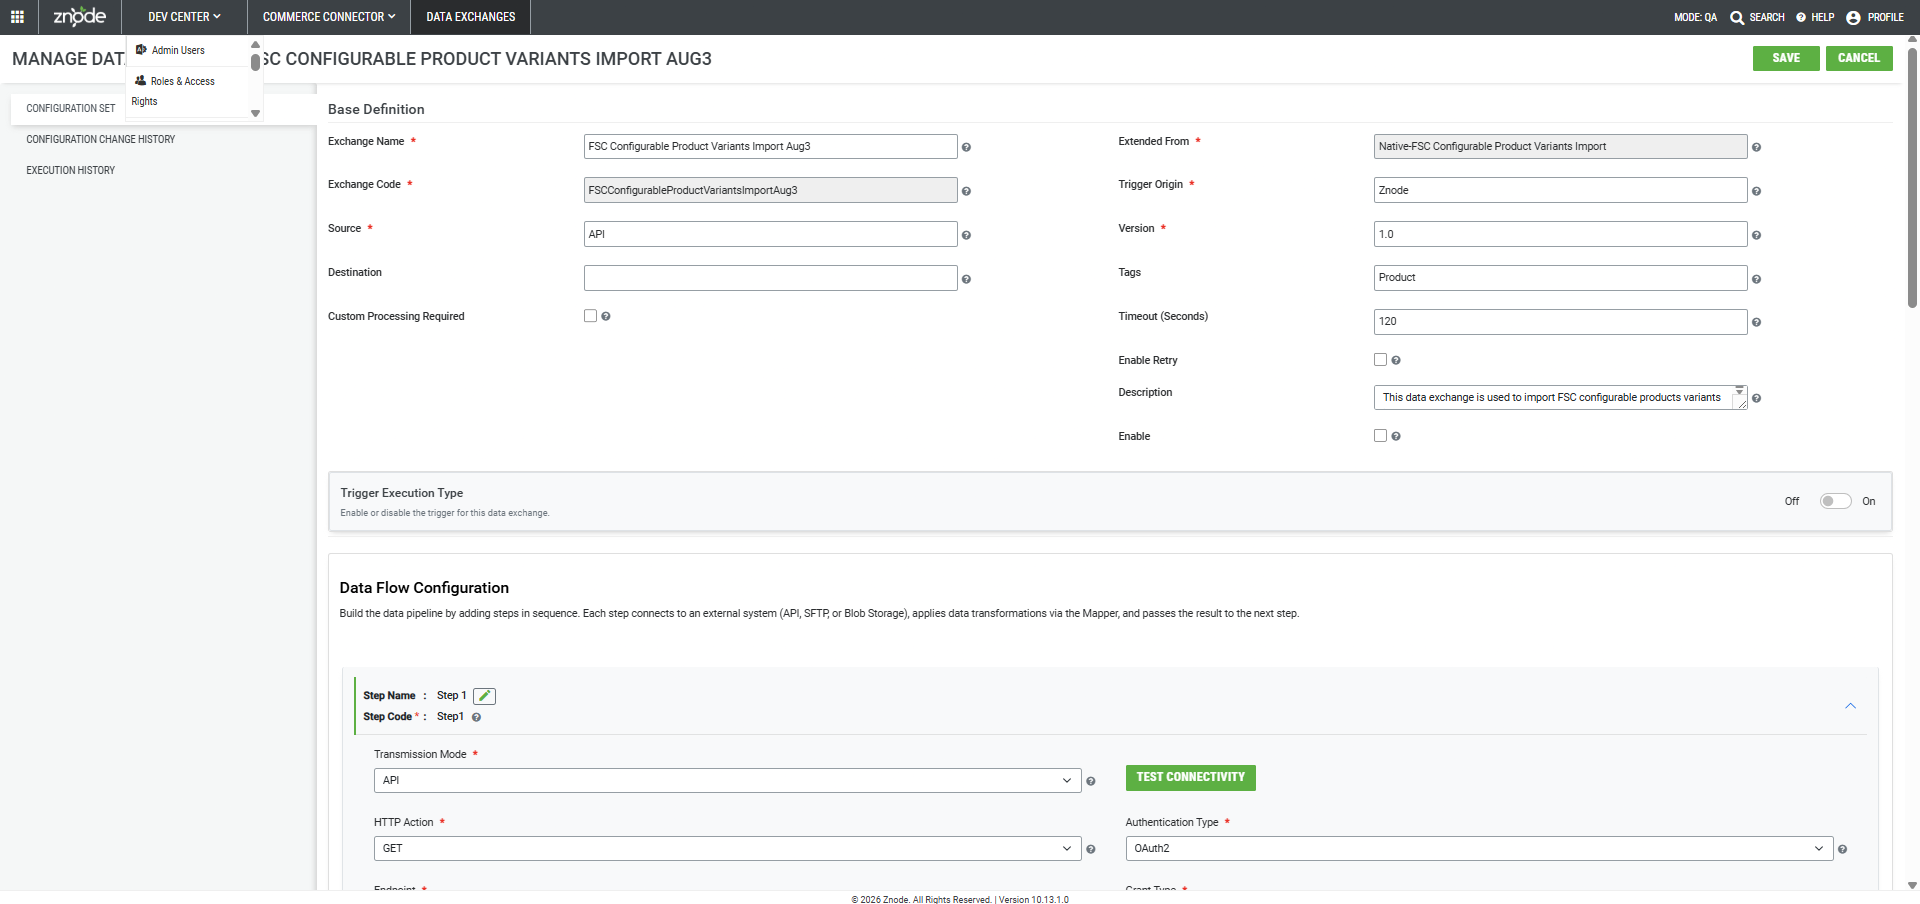
Use this procedure when you need to configure a new integration workflow between Znode and an external system.
- Open the Data Exchanges page.
- Select Add New or Add from Library.
- Note: The Add From Library contains the list of native data exchanges available.
- Enter a name that clearly identifies the integration.
- Select the appropriate source system.
- Configure the destination system.
- Define the data mapping and transformation rules required for the integration.
- Configure execution options, including scheduling or real-time processing.
- Save the Data Exchange configuration.
Result: The new Data Exchange becomes available for execution and monitoring.
Configure Data Mapping
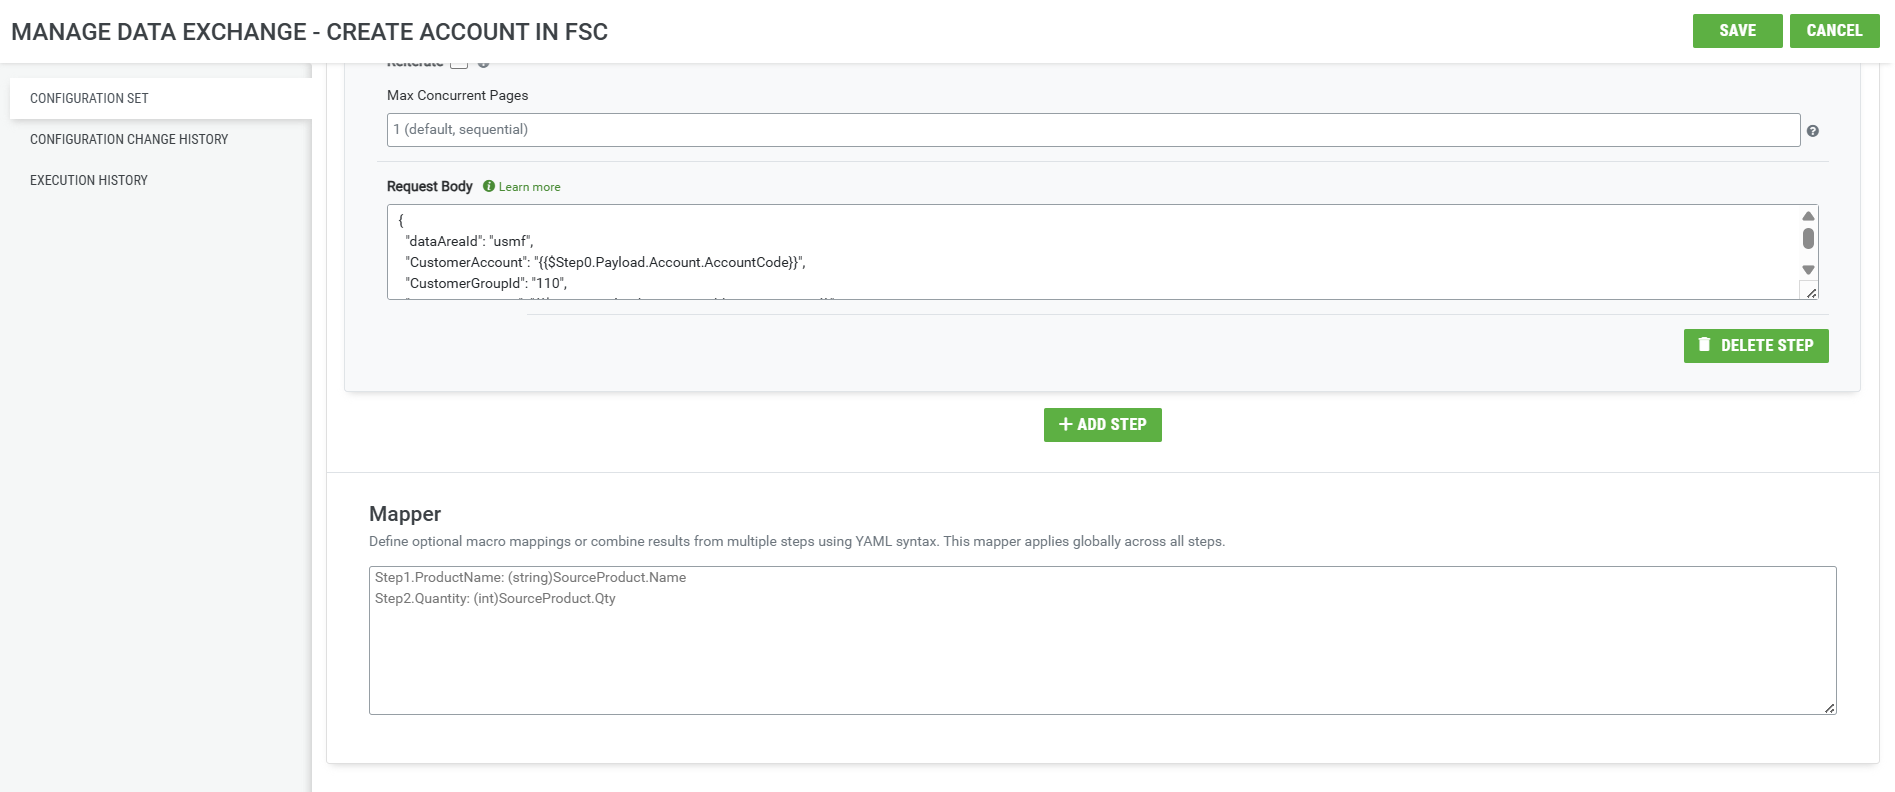
Data mapping determines how information is transferred between systems.
- Open the required Data Exchange.
- Navigate to the mapping configuration section.
- Select the source fields.
- Map each source field to its corresponding destination field.
- Configure any required transformation logic.
- Save the mapping configuration.
Result: Data can be exchanged using the defined field relationships.
Run a Data Exchange
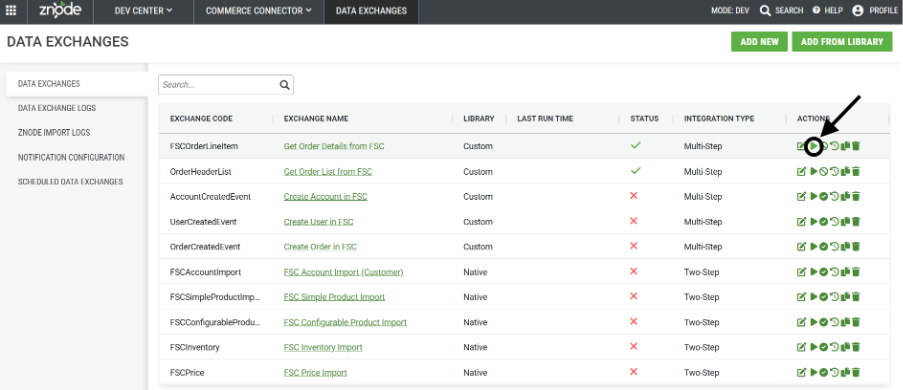
Use this procedure to manually execute a configured Data Exchange.
- Open the Data Exchanges page.
- Locate the desired Data Exchange.
- Select Run or the equivalent execution option.
- Monitor execution progress.
Result: The Data Exchange processes records between the configured systems.
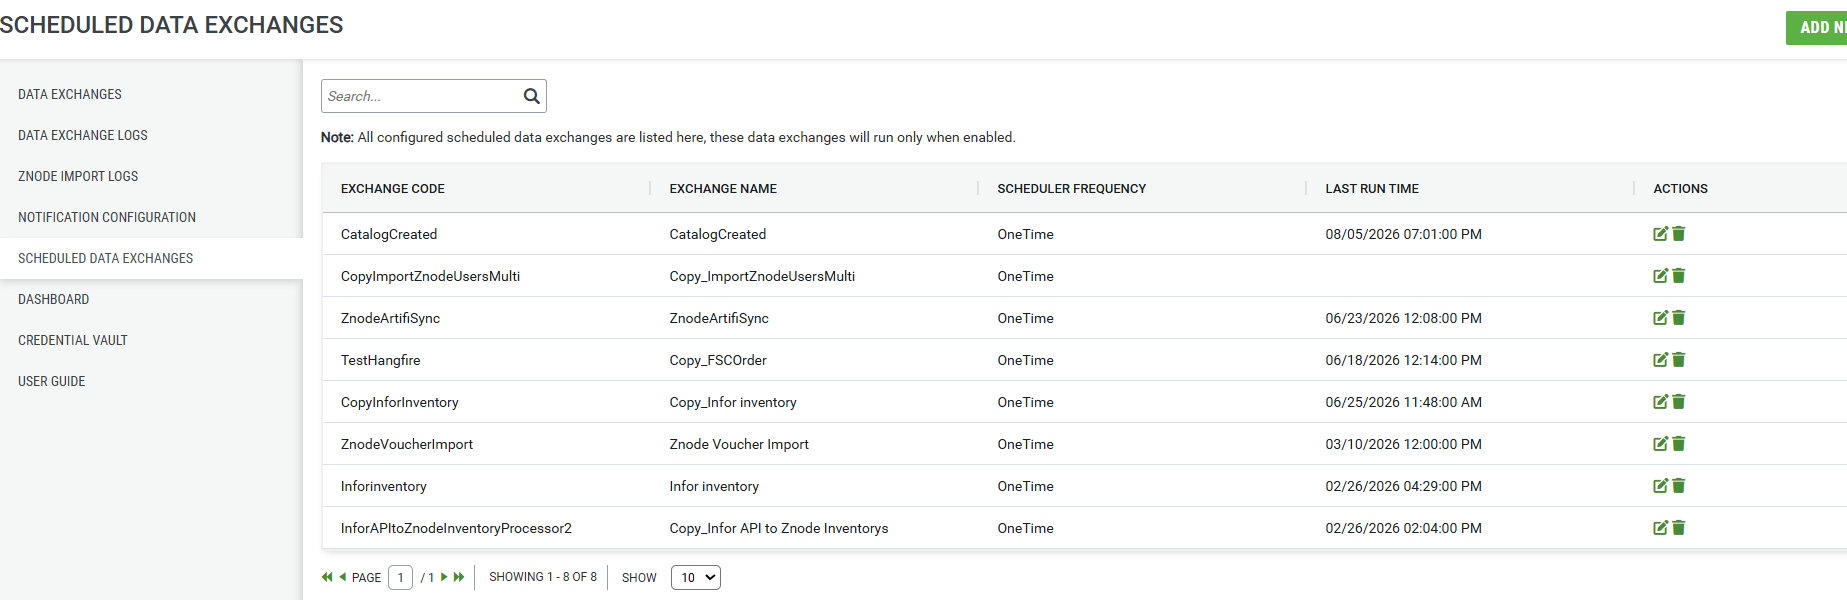
Schedule a Data Exchange
Scheduling allows integrations to run automatically at predefined intervals.
- Open the Data Exchange dashboard.
- Navigate to the scheduled data exchanges.
- Select Data Exchange.
- Define the execution frequency.
- Specify the desired date and time settings.
- Save the configuration.
Note: Only active and enabled data exchanges can be scheduled. Data exchanges with the Trigger Execution Type (HTTP) option enabled (Yes) are not eligible for scheduling.
Result: The Data Exchange executes automatically according to the schedule.

Monitor Data Exchange Activity
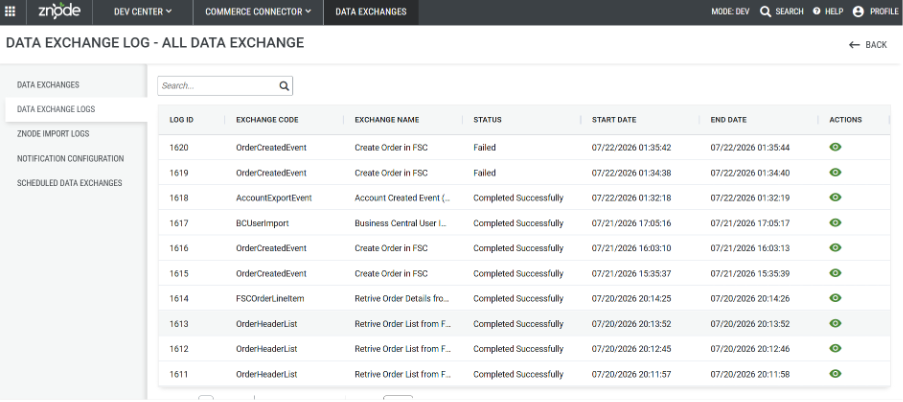
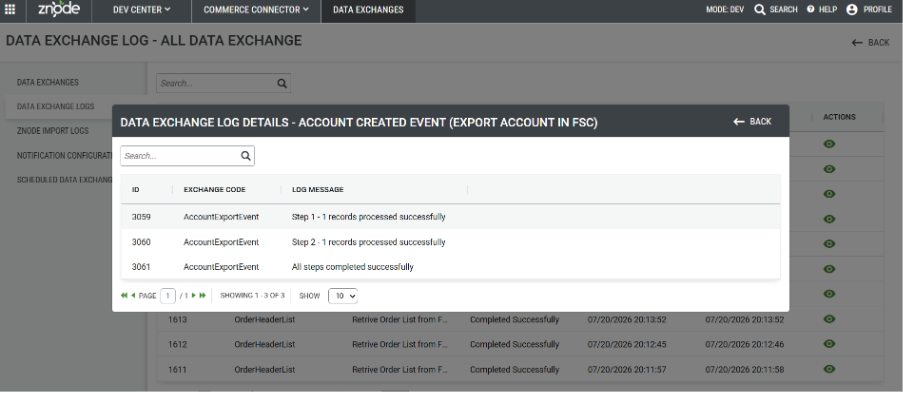
Administrators can review execution activity to validate successful data synchronization and identify errors.
- Open the Data Exchange.
- Navigate to the data exchange logs.
- Review execution records.
- Inspect any warnings or errors.
- Address configuration or data issues as needed.
Result: Administrators can verify data processing status and troubleshoot integration issues.
Validate Successful Processing
After a Data Exchange completes:
- Review the execution status.
- Confirm that records were processed successfully.
- Verify that data appears correctly in the destination system.
- Check logs for warnings or validation messages.
Result: Data remains synchronized across connected systems.
Data Exchange Grid
- Integration Type Column
- A new Integration Type column is added to the Data Exchange listing page.
- Supported values:
- Two-Step – Legacy integration architecture
- Multi-Step – Enhanced configurable integration flow
- Supported values:
- A new Integration Type column is added to the Data Exchange listing page.
Best Practices
- Use descriptive names for Data Exchanges to simplify administration.
- Validate mappings before scheduling automated integrations.
- Review execution logs regularly to identify issues early.
- Test new integrations in a non-production environment whenever possible.
- Monitor high-volume integrations to ensure optimal performance.
Troubleshooting
Data Exchange Fails to Execute
Possible causes include:
- Invalid connection credentials.
- Unavailable source or destination systems.
- Configuration errors within the Data Exchange.
- Mapping or validation issues.
Review execution logs and correct any reported errors before rerunning the exchange.
Data Is Not Updating
Possible causes include:
- Incorrect field mappings.
- Scheduling configuration issues.
- Source system data validation errors.
- Connectivity issues between systems.
Verify configuration settings and review execution history for additional details.
Additional Information
Data Exchanges are designed to provide administrators with greater control over enterprise integrations directly within the Znode Admin Console. They support configurable workflows, automated synchronization, monitoring, and logging capabilities to help maintain accurate data across connected business systems.